
Under kitchen sink organization for renters starts with one practical question: what needs to be easier tomorrow morning, not what would look best in a perfect photo. This guide keeps the setup realistic for small homes, rentals, and busy weeks.
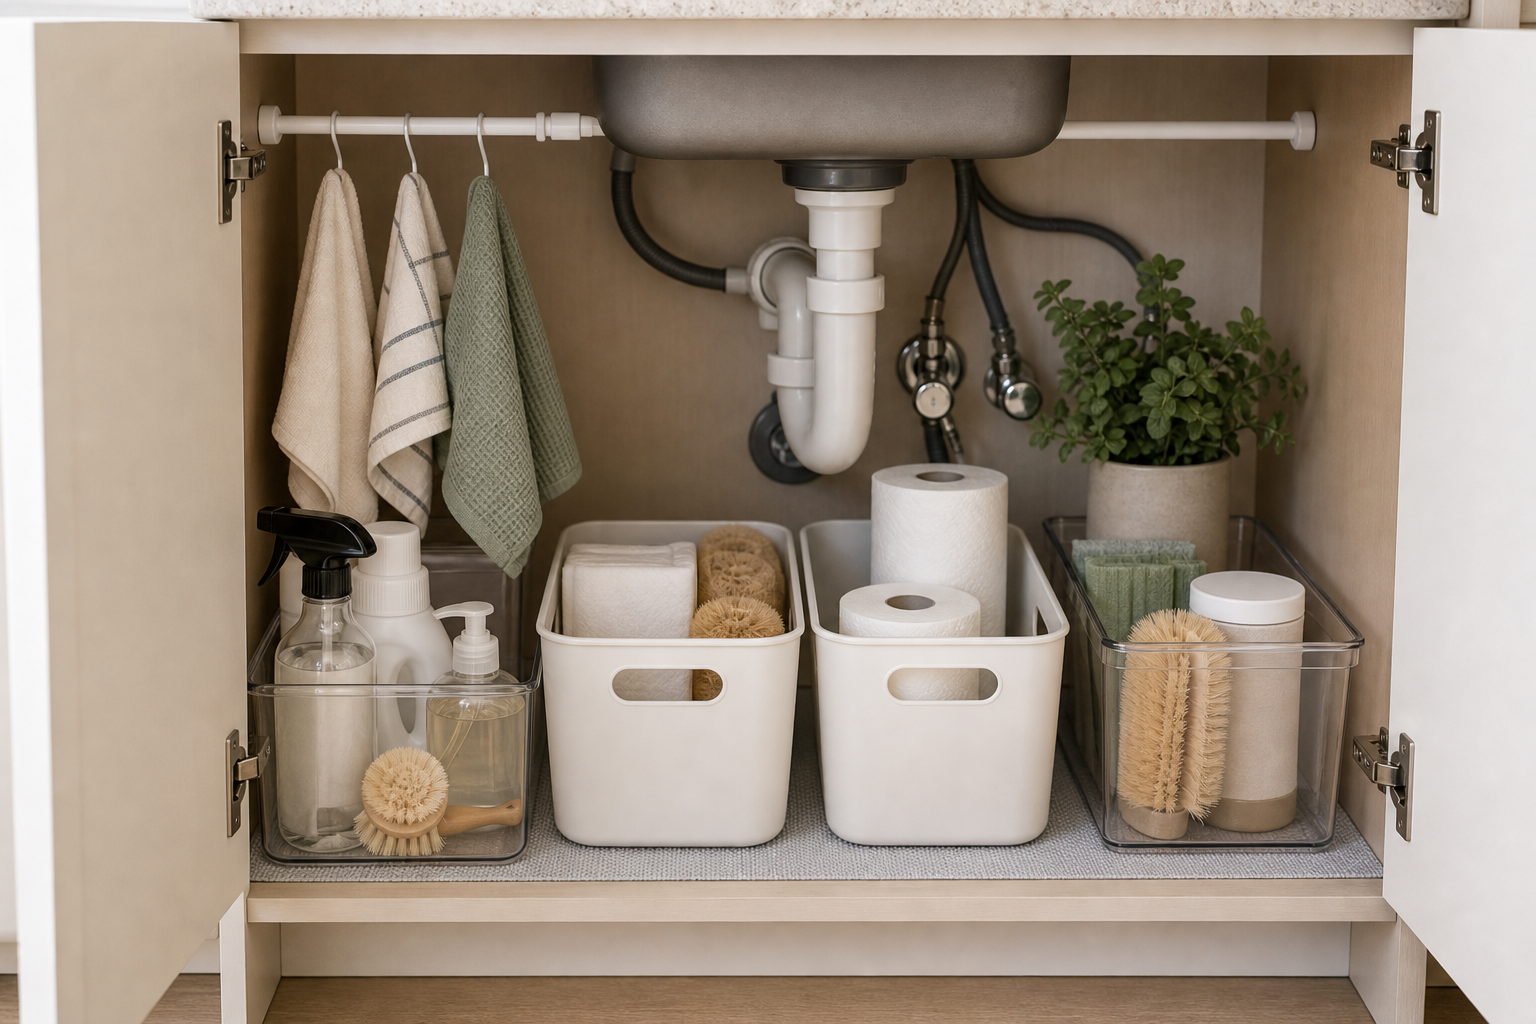
Table of Contents
Under Kitchen Sink Organization For Renters: Quick Answer
The best under kitchen sink organization for renters plan protects the easiest space for daily use, moves overflow one step away, and uses containers that can be reset quickly. Start with the items you touch most often, then give backups and occasional items less convenient homes.
This guide keeps the advice focused on the room problem itself: what needs first reach, what can move to overflow, and which storage choice will still work after a busy week.
Start With Plumbing Access
The under-sink cabinet has one job that matters more than storage: plumbing access. Keep pipes, shutoff valves, and the back wall visible enough to inspect. A perfect bin layout is not worth hiding a slow leak.
Before adding organizers, remove everything and wipe the cabinet floor. Check for damp spots, swollen wood, or old spills.
Keep Plumbing Access Clear
Place bins on the left and right sides instead of packing the middle. Use the center space for pipes, a leak mat, or a small caddy that can move quickly.
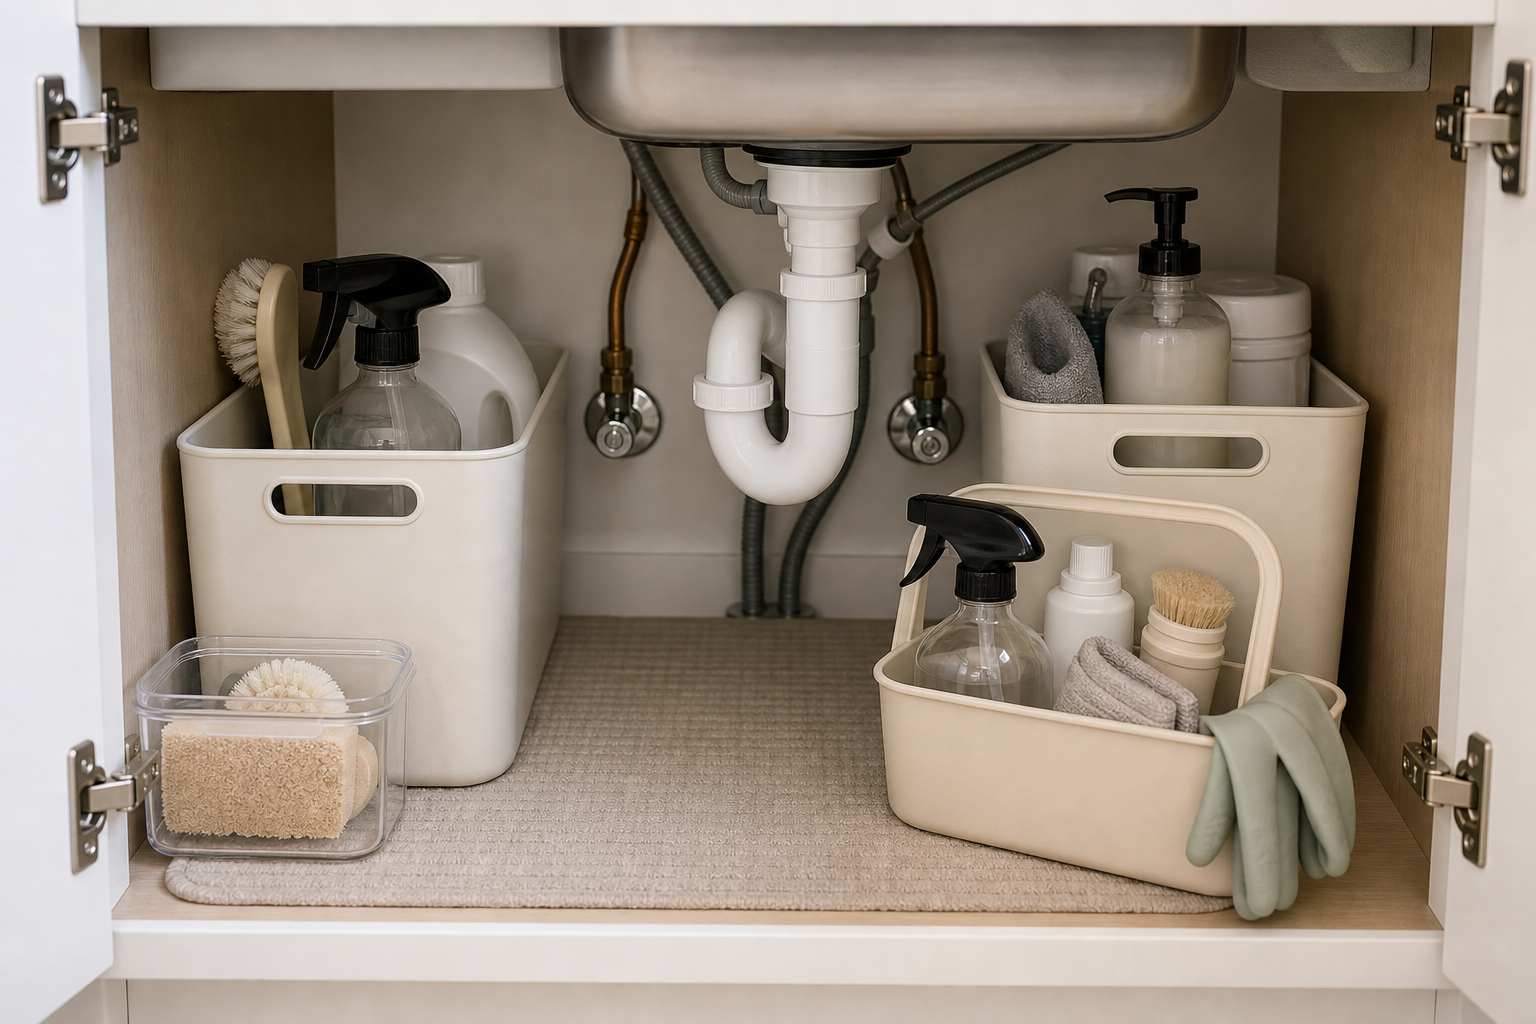
Avoid permanent pull-outs unless your lease allows installation. Removable bins are safer for renters and easier to clean after spills.
Use A Portable Cleaning Caddy
A portable caddy keeps daily cleaning supplies together. Store the caddy near the front so it comes out in one motion. This prevents the cabinet from becoming a pile of loose bottles and brushes.
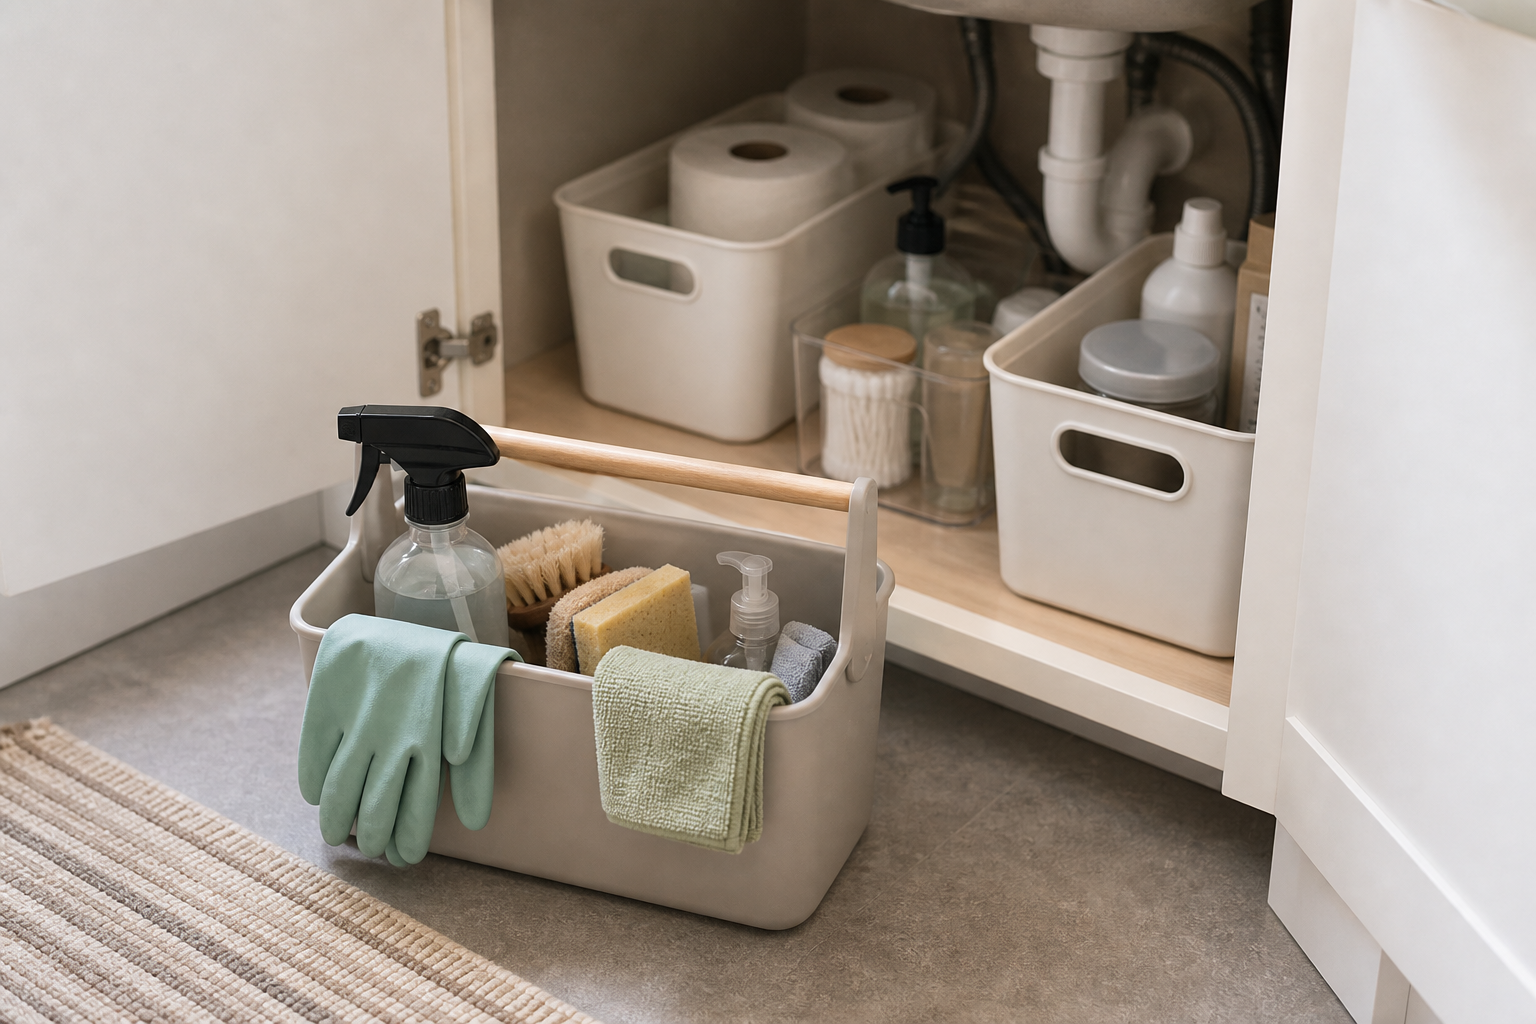
Keep products upright and do not mix chemicals in a closed bin. If a bottle leaks, the caddy should be easy to rinse.
Add A Leak Mat Before Pretty Bins
A waterproof mat or tray protects the cabinet floor and makes leaks easier to see. Choose one that can be removed without disturbing the plumbing.
A mat is not a substitute for checking the cabinet. It simply gives spills and drips a contained place to show up.
Use A Tension Rod Lightly
A tension rod can hold light cloths or small spray bottles if the cabinet sides are sturdy. Do not overload it or wedge it so tightly that it damages the cabinet.
The rod should support the system, not become the main structure. Heavy products belong in bins on the cabinet floor.
Separate Cleaning From Kitchen Extras
Under the sink is not the best place for food, paper plates, or bulk towels if cleaning products are stored there. Keep cleaning supplies in one zone and non-cleaning items elsewhere.
Clear categories reduce the chance of spills, odor, and forgotten duplicates.
Do A Monthly Leak And Expiration Check
Once a month, pull out the bins, wipe the floor, and check bottles for leaks or expired products. This small habit protects the cabinet and keeps the storage from turning into a hidden mess.
If a product has not been used in months, move it to a backup area or dispose of it according to the label.
Quick Buying Checklist
Before buying anything for under kitchen sink organization for renters, measure the space and decide which category deserves the easiest reach. A product that technically fits can still fail if it blocks a door, drawer, cabinet, walkway, pipe, outlet, vent, or daily movement.
- Measure width, depth, and height before buying storage for under kitchen sink organization for renters.
- Choose freestanding, removable, or cabinet-supported storage when renting.
- Keep heavy items low and light repeat-use items higher.
- Leave one empty margin so the system can be reset without a puzzle.
- Take one phone photo after the reset so you know what the working version looks like.
What Not To Buy Yet
Skip any organizer that requires perfect habits. If the item has to be folded, aligned, nested, or returned with two hands every single time, it may not survive a normal week. The safest version of under kitchen sink organization for renters is usually boring, visible, and easy to restore.
Also avoid buying a full matching set before testing the layout. Matching bins can waste space when shelves, cabinets, counters, or closets have awkward dimensions. Test one zone first, then repeat what works.
Three Layout Recipes To Try First
The daily-use recipe: Put the five to ten items you touch most often in the easiest zone, then move everything else one step farther away. This recipe is best when the area looks cluttered even after you tidy it. It makes under kitchen sink organization for renters feel calmer because the visible space has fewer decisions.
The overflow recipe: Keep the main zone light and create one overflow spot for backups, seasonal items, or duplicates. The overflow spot should be easy enough to reach when you need a refill but inconvenient enough that it does not become daily clutter. This is especially useful in rentals and small rooms where one crowded shelf can make the whole space feel stuck.
The renter-safe recipe: Put weight on the floor, inside cabinets, on a dresser, or on freestanding furniture. Use removable products only for lightweight repeat-use items. This version protects the space and keeps under kitchen sink organization for renters from depending on an adhesive hook, a tight corner, or a product that only works in a staged photo.
Common Mistakes To Avoid
The first mistake is buying storage before removing duplicates. Extra bottles, extra linens, extra clothing, and extra tools make every organizer look too small. Edit the category first, then decide what size container it actually needs. The second mistake is hiding daily items too well. A closed bin can look tidy, but if it makes a daily item annoying to reach, that item will return to the counter, bed, floor, or nearest flat surface.
The third mistake is ignoring the reset path. If an item is easy to take out but hard to put back, the system will fail during a normal week. Good under kitchen sink organization for renters should make returning the item almost as easy as grabbing it. That usually means fewer categories, shorter stacks, lighter bins, and enough empty space for your hand to move.
A Simple Seven-Day Test
After setting up the first version, use it for a full week before buying more. Notice which items drift out of place, which containers are too full, and which categories still need a better home. A week of normal use tells you more than a perfect reset photo. If the same object lands in the same wrong spot three times, move the storage closer to that spot instead of blaming the habit.
At the end of the week, remove one item, resize one category, or move one container. Small adjustments work better than rebuilding the whole space. The goal is not a flawless shelf. The goal is a setup that still makes sense when you are tired, busy, or putting things away quickly.
Container Sizing Rules That Prevent Clutter
Containers should fit the category, not the other way around. A deep basket can hide too much, a narrow tray can become crowded, and a tall bin can make lower items disappear. Choose shallow containers for daily items, handled bins for pull-out categories, and open baskets only when the contents are easy to recognize at a glance.
Leave a little empty space in every container. The empty margin is not wasted space; it is what lets the system accept real life. If a bin is packed perfectly on day one, it will overflow as soon as laundry returns, groceries come home, or one extra backup item is added. A working setup needs room for the ordinary mess of a week.
How To Decide What Stays Visible
Visible storage is best for items used daily or items that are forgotten when hidden. Hidden storage is better for backups, seasonal items, occasional tools, and anything that creates visual noise. When a category is visible, keep it smaller and neater. When a category is hidden, make it easy to pull forward so the back of the shelf does not become a dead zone.
A good rule is to store by frequency first and by beauty second. The prettiest setup will not last if the most-used object is stored behind three other things. Place repeat-use items where your hand already goes, then use bins, trays, carts, or shelves to make that spot look intentional.
When To Stop Organizing
Stop when the space is easier to use, not when every product matches. The last ten percent of styling often adds the most cost and the least function. Matching labels, extra baskets, and decorative containers can wait until the basic system survives normal use.
If the area can be reset in a few minutes, if the main category is easy to find, and if the floor or counter is no longer catching overflow, the system is doing its job. Save the remaining budget for a problem that still slows down the household.
How To Keep The System Working
Give the setup seven days before calling it finished. Notice what lands on the floor, what stays on the counter, what never makes it back into a bin, and what you still cannot find. Those friction points show where under kitchen sink organization for renters needs a smaller category, a more visible container, or fewer items.
Once a week, remove trash and empty packaging, bring duplicates forward, return each category to its zone, and decide whether anything has outgrown its container. A good system is not a one-time makeover. It is a short reset that keeps under kitchen sink organization for renters from sliding back into clutter.
Helpful Sources And Related Guides
Use practical storage with common sense: keep heavy furniture stable, avoid moisture traps, and keep cleaning or food-related items in safe zones.
- EPA safer cleaning choices
- Renter Friendly Kitchen Storage No Drilling
- Kitchen Counter Organization For Small Kitchens
- Renter Friendly
FAQ
How do renters organize under the kitchen sink?
Use removable bins, a portable cleaning caddy, a leak mat, and light tension storage while keeping plumbing access clear.
Can renters install pull-out shelves under the sink?
Only if the lease allows it. Removable bins are usually safer because they do not require screws or permanent changes.
What should not be stored under the kitchen sink?
Avoid food, paper goods that can absorb moisture, heavy loose bottles, and anything that blocks pipes or shutoff valves.
Final Takeaway
Under kitchen sink organization for renters works when the setup is honest about space, weight, frequency, and daily habits. Start with the zone that bothers you most, make it easy to reset, and keep backup storage from taking over the easiest place to reach.