
Jewelry-making clutter is measured in millimeters. One open jump ring can vanish into a rug, wire ends catch a sleeve, beads from different lots mingle, and an unfinished clasp arrangement loses its order when the dining table must return to dinner.
Jewelry supplies should be divided by scale and hazard. Findings, wire, beads, sharp tools, chemicals, precious components, and active assemblies become safer and faster when each has a visible count and a controlled tray. That is the standard these small apartment jewelry making supplies storage ideas need to meet in a lived-in room.
Read labels and safety data for every adhesive, patina, soldering material, cleaner, resin, coating, metal, and tool. Ventilation, heat, sharp edges, dust, fumes, skin contact, and ingestion risks differ by process. Secure small parts and tools from children and pets, avoid food surfaces during hazardous work, and use only processes suitable for the home environment.
Measure the smallest finding, longest pliers, wire spool diameter, bead tube height, project mat, closed project box, drawer depth, task-light footprint, and receiving shelf. Include clearance to lift a compartment without tipping adjacent trays.
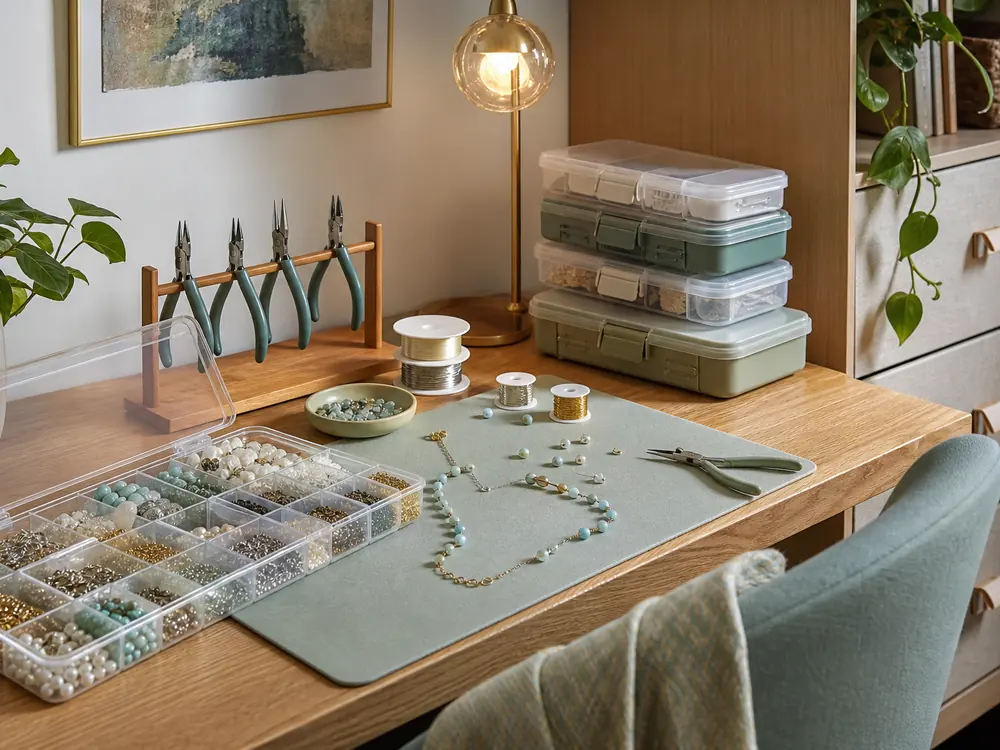
Small Apartment Jewelry Making Supplies Storage Ideas Begin By Function
Separate beads, findings, wire, chain, tools, labeled products, packaging, and active projects before sorting by color. Function determines retrieval and safety while color alone can hide incompatible sizes, finishes, and processes. Keep original identity, material, size, finish, lot, and warning information whenever it affects use or value.
The strongest evidence for “Small Apartment Jewelry Making Supplies Storage Ideas Begin By Function” is a clean return with one hand occupied and the room in normal use. Keep “Use Removable Trays For Findings” in place during the test. A system for jewelry making supplies that works only after clearing the room has solved a styling problem, not a storage problem.
Use Removable Trays For Findings
Place clasps, rings, crimps, backs, and connectors in shallow lidded compartments that lift as complete families. Removable trays reveal stock without asking tiny pieces to travel across the room. Test every latch over a clean mat and stop filling before parts bridge dividers or jam the lid.
The visual calm promised by “Use Removable Trays For Findings” comes from fewer unresolved decisions, not hidden contents. Name anything awaiting repair, cleaning, disposal, or research before moving on to “Keep Beads In Identified Lots.” That makes the jewelry making supplies cabinet honest about what is ready and what still requires attention.
Keep Beads In Identified Lots
Store beads by material, size, finish, and purchase lot in closed clear containers rather than combining look-alikes. Similar beads can differ in hole size, coating, durability, value, and replacement availability.
Record quantity only when useful and isolate shedding, cracked, corroded, or unknown material for assessment. One project box makes small apartment jewelry making supplies storage ideas compatible with a shared table.
A staged room can make “Keep Beads In Identified Lots” look effortless, but a working apartment also has doors, laundry, meals, and tired cleanup. Test this jewelry making supplies choice while “Control Wire Chain And Cord” is still in progress. If those jewelry making supplies routines collide, reduce the active quantity or move the slower category rather than accepting a permanent floor pile.
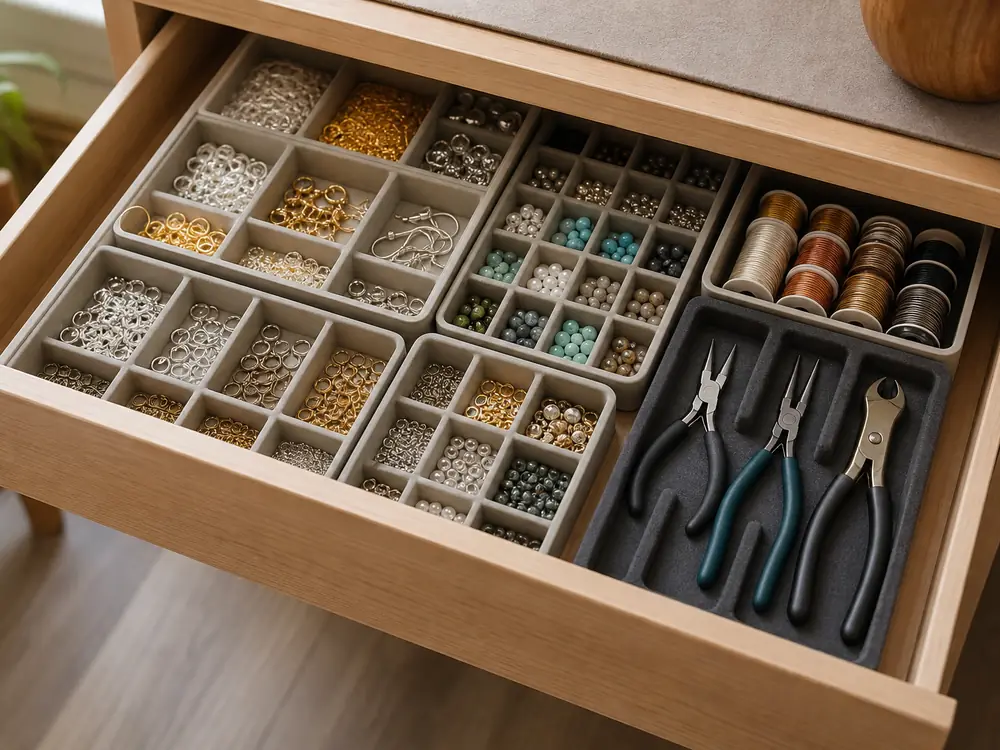
Control Wire Chain And Cord
Support wire spools and chains so ends are captured, curves remain gentle, and the required gauge or material stays visible. Loose wire tangles, springs open, and creates sharp ends while chain disappears beneath heavier containers. Cap cut ends, inspect coatings and kinks, and separate precious or sensitive metals from abrasive scraps.
A renter-friendly solution for “Control Wire Chain And Cord” should survive a cabinet change without depending on custom construction. Use removable support, a clear inventory, and dimensions that also respect “Protect Pliers Cutters And Needles.” This keeps jewelry making supplies adaptable without turning every move into a complete reorganization.
Protect Pliers Cutters And Needles
Give each hand tool a fitted slot, rack, or closed roll with points and cutting edges protected. A crowded cup hides damage and encourages fingers to search among sharp profiles. Inspect joints, grips, alignment, residue, and intended use before returning tools to the clean zone.
Treat “Protect Pliers Cutters And Needles” as successful only when another person can understand the boundary without a private explanation. The relationship to “Secure Chemicals And Heat Processes” should be visible through location, support, or a concise label. That clarity protects jewelry making supplies when routines change or the apartment is shared.
Secure Chemicals And Heat Processes
Store current labeled compounds according to maker guidance in a secured separate area and keep heat processes out of unsuitable rooms. Convenient proximity does not override ventilation, ignition, incompatibility, or household-access requirements. Review safety data, local disposal, fire precautions, ventilation, and whether professional workspace is required.
There is a useful limit hidden inside “Secure Chemicals And Heat Processes”: the group should remain small enough to inspect before the next session. Once that boundary is exceeded, “Build One Lidded Project Box” becomes harder and condition disappears behind quantity. For jewelry making supplies, editing the group is often more protective than adding another layer.
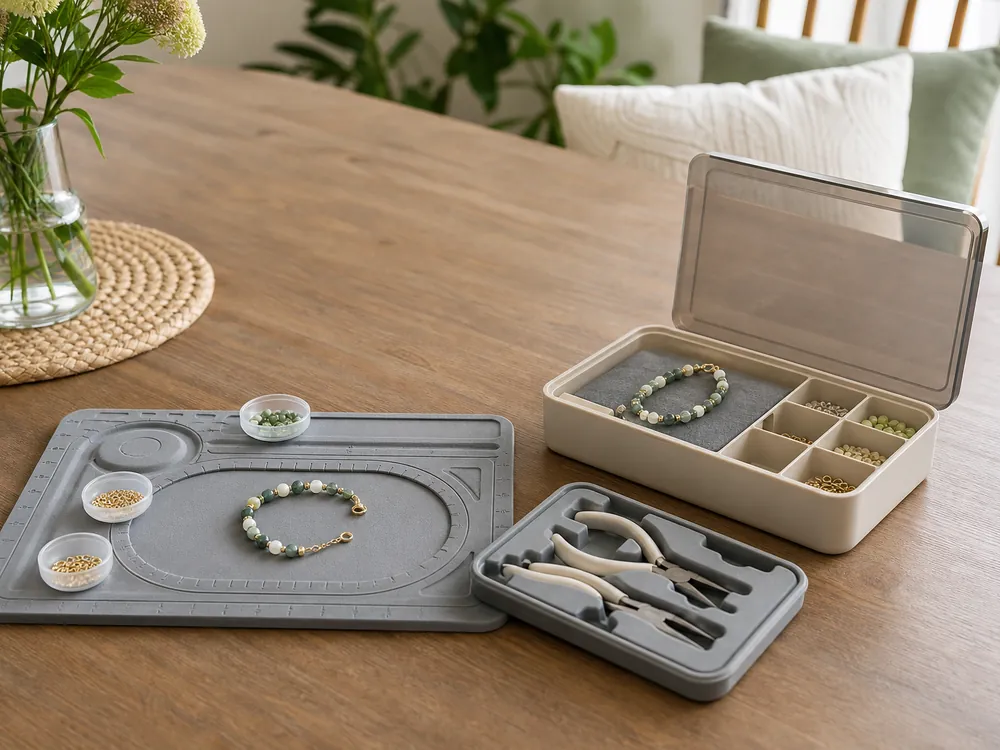
Build One Lidded Project Box
Move the exact findings, tools, pattern, and unfinished piece for one design into a shallow box with a bead mat. A project box preserves sequence and lets a shared surface clear without mixing parts back into inventory.
Add a brief next-action note and remove every unnecessary tool before closing the lid. A careful reset keeps small apartment jewelry making supplies storage ideas free from lost findings and exposed wire.
Let material behavior settle the conflict between “Build One Lidded Project Box” and “Track Inventory Before Reordering.” Weight, moisture, abrasion, light, heat, and contamination do not negotiate with a matching basket. For jewelry making supplies, the safer condition should determine placement even when the result is less symmetrical.
Track Inventory Before Reordering
Maintain a simple list for frequently used findings, wire, and consumables with minimum useful quantities. Inventory prevents duplicate purchases when tiny parts look absent only because they occupy several containers. Review dormant materials, broken components, and unidentified lots before adding another organizer.
Reset The Table With A Magnet-Free Sweep
Collect visible parts methodically with trays, cups, good light, and a hand inspection rather than relying on a magnet for mixed metals. Not every component is magnetic, and a magnet can complicate delicate, electronic, or intentionally magnetized materials. Check floor, chair seams, sleeves, project mat, tools, and waste before food or ordinary household work returns.
Before Buying Organizers For Jewelry Making Supplies
Use the links below to compare formats for jewelry making supplies, then return to the real apartment measurement. The most compact option is a poor choice when it makes “Reset The Table With A Magnet-Free Sweep” harder.
These small apartment jewelry making supplies storage ideas searches can reveal useful formats, but today's dimensions, materials, availability, and product claims still require direct verification.
Care Sources For Small Apartment Jewelry Making Supplies Storage Ideas
Sources for jewelry making cover its safety and material care. The related Her Neat Nest guides connect this jewelry making plan with nearby apartment zones.
- U.S. Consumer Product Safety Commission Art and Craft Safety Guide
- Small Apartment Craft Storage Ideas
- Small Apartment Hobby Storage Ideas
- Small Apartment Art Paint Supplies Storage Ideas
Small Apartment Jewelry Making Supplies Storage Ideas: Practical Questions
How do you organize jewelry-making supplies in a small apartment?
Separate supplies by function, retain material and size information, use lidded removable trays for tiny findings, protect sharp tools, and keep one active design in a closed project box.
What is the best way to store beads and findings?
Use shallow closed compartments that can be lifted as complete groups, and keep beads identified by material, size, finish, and lot instead of mixing look-alikes.
Can jewelry-making supplies be stored in a kitchen?
Avoid storing hazardous products or using risky processes near food; follow product labels and safety data, and choose a secured area appropriate to the specific materials.
Use “Small Apartment Jewelry Making Supplies Storage Ideas Begin By Function” to set up the jewelry making system; let “Reset The Table With A Magnet-Free Sweep” judge the return. Every jewelry making group should finish its task without borrowing a chair or a neighboring shelf. When the collection or route changes, revisit small apartment jewelry making supplies storage ideas and correct the smallest failing boundary before adding another container.